
Harbor Havoc Map Kit Guide
Video Tutorial
Below is a YouTube video covering all of the information in this article, feel free to reference this if you are struggling to understand any of the documentation. The information in the video is bookmarked to make it easier to reference.
Island/Harbor
Island/Harbor directories directly house all the various components of an island or harbor.
Terrain
Upon pressing the Run button in Roblox studio, all terrain in the workspace (within the bounds of the water + 50 studs of height above) will be saved to a “TerrainRegion” object under your Island/Harbor directory.
If there is no terrain present in the workspace when pressing run, the script will instead Load in previously saved terrain if it’s available (this can be used to test saved terrain regions or to preview reference maps’ terrain).
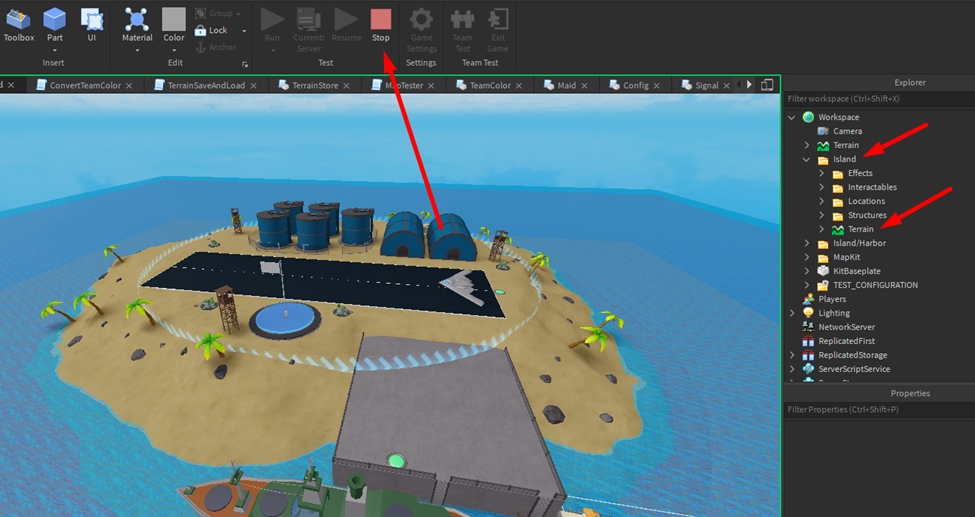
To save this terrain, simply copy the terrain region, press stop & paste it under the Island/Harbor directory.
WARNING: Roblox WILL automatically nudge the region’s marker parts if you paste it under the Workspace!!! To avoid this, place the Island/Harbor directory under ServerStorage before pasting the terrain region into it.
Effects
Effects are points that indicate island/harbor health or destruction.
Effects will be spawned at the center of these parts.
The names of these parts determine their intensity/max size.
Explosion effect points indicate where explosions will occur when an island/harbor is fully destroyed.
This is useful for things like barrels that become severed in half when in their dead state.
Fire & Smoke effect points indicate the island’s/harbor’s current health by scaling from 0 to their defined max size as health decreases.
Interactable
Interactable items are items that the player can “interact” with via user input (like turrets & vehicle spawners).
These items follow strict placement guidelines to ensure smooth gameplay.
Turrets
The placement of turrets is very simple, simply place the turret part where you would like it and rotate it accordingly.
Note: Make sure the turret part is flush with the ground to prevent floating turrets.
Vehicle Spawners
Vehicle spawners come in 5 varieties:
- SmallBoat (Small Boats: Jet Ski, Speedboat)
- MedBoat (Medium Boats: Destroyer, Cruiser, Battle Cruiser)
- Boat (Small & Medium Boats: Jet Ski, Destroyer, Cruiser, Speedboat)
- Ship (Large Ship Boats: Aircraft Carrier, Battleship)
- Plane (Gunner, Bomber)
NOTE: As of June 2023, there is only 1 gamemode in harbor havoc, which does NOT allow for large ships to be spawned on islands, as such, all ship spawners inside of islands will be converted to MedBoat spawners at run-time if used!
The placement of vehicle spawners consists of 3 object types:
- Prompt Button Point (Prompt)
- Target Vehicle Spawn Center (Center)
- Vehicle Spawn Location Obstacle Markers (Edges)
The use of these placement elements is best shown through an example:
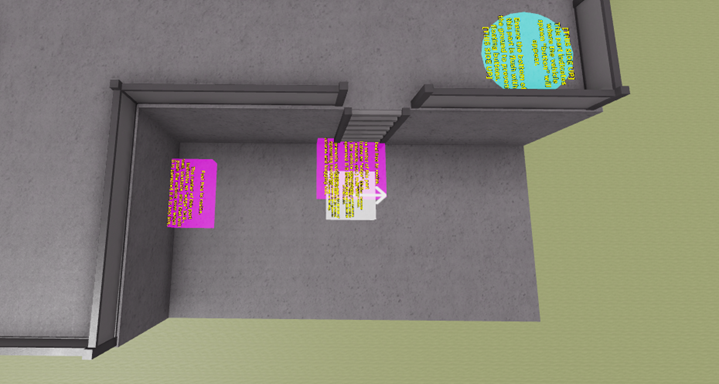
In the image above, we have the port on the industrial map’s island.
The prompt is shown in teal, the center in white and the edges in pink.
The center (white) has been placed right next to the ladder as this would ideally be where we would want the vehicle to spawn to be most easily accessible to the player.
Obviously though, unless the boat is small; it won’t be able to have its center point placed there, which is why I’ve placed 2 edge points (pink) to ensure that the boat is nudged over to ensure it does not spawn inside of any of those walls.
Locations
Locations are parts that indicate different functional locations within structures.
Player Spawn
These are self-explanatory; Player Spawns are where players will spawn in when deploying on the given island/harbor.
There can be multiple player spawns and they will be cycled through to balance player distribution.
Note: Ensure the top face of the player spawn is flush with the ground as players will have the bottom of their feet placed directly on top of the top surface of the spawn.
Billboard Zone
This box part indicates the zone where a “billboard” will be spawned to hype updates & share other information.
Note: Ensure the bottom face of this part is flush with the ground to prevent floating structures.
Capture Zone
This cylindrical part indicates where the island’s/harbor’s “capture structure” will be spawned.
Currently there is only one game-mode in Harbor Havoc where flags are spawned, but in the future, these points can be configured to easily spawn in other structures (e.g., diffuse the bomb).
These points should have a circular platform built beneath them to prevent the structure looking out of place (see industrial map’s island for example).
Note: Ensure the bottom face of this part is flush with the ground to prevent floating structures.
Hold Zone
This part indicates the zone in which the island/harbor is being “held”.
Imagine a King of the Hill game mode in which a massive halo is spawned around the island/harbor to indicate the capture zone to players.
The outer rim of this part will serve as the perimeter in which this halo is placed around.
Structure Types
The structure directory is where various miscellaneous builds are housed.
This directory is divided up into 3 different categories:
- Dead (destroyed buildings, exploded barrels, etc.)
- Alive (constructed buildings, brand new barrels, etc.)
- Neutral (rocks, sand & other non-destructible builds)
Tags
Tags serve to add various functionality to your builds.
Need a tent to change color based on the team that owns it?
Need a satellite dish to spin?
Need a door to teleport a player to a different part of the island/harbor?
There’s a tag for that!
Functional Tags
Functional tags provide additional functional behavior to parts/groups of parts that they are placed under.
Can Collide
This tag extends the behavior of the “Can Collide” property, allowing you to whitelist/blacklist specific vehicle types & players from colliding with a given instance.
Team Color
This tag colors the given instance based on the team that owns it, (e.g., Red, Blue, Grey).
Under the Team Color tag, there are 3 configurable values:
- Hue Offset
- Saturation Offset
- Value Offset
Hue, Saturation and Value are a way of communicating color (similar to RGB).
The “offset” values under this tag indicate how much these values should offset themselves from the color they are being set to.
For example,
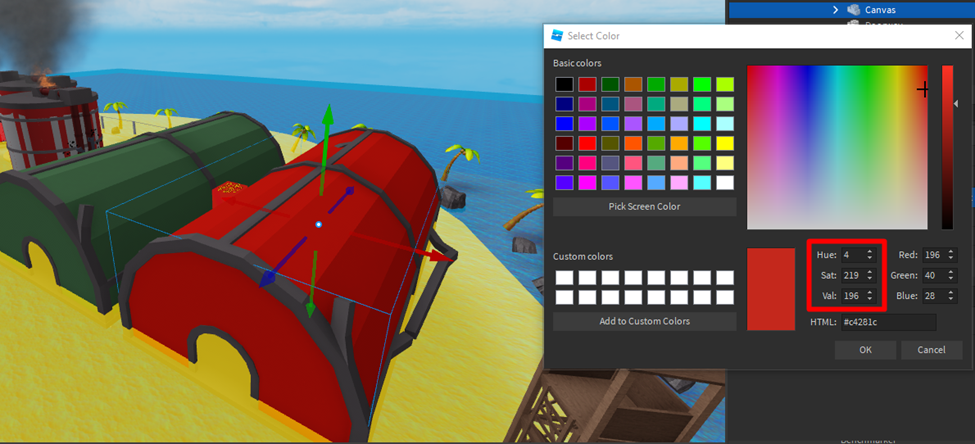
Say we want to setup the coloring for these tents.
Upon applying Red’s team color, we find that it looks un-naturally bright 🤮.
To fix this, we must find out which shade of blue we would prefer the tent to be when it is occupied by the Red team and use that to find the difference or “offset” of this shade’s Hue, Saturation & Value from the original’s using basic subtraction “(Desired – Original) = Offset”.
Since this is a somewhat tedious task, I’ve written a tool in the kit place to help make this easier.
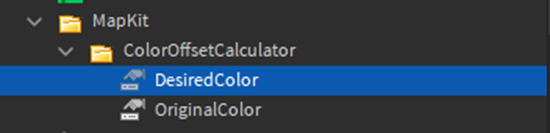
Under the ColorOffsetCalculator directory, simply set the original color and desired color values to your preference and press “Run” to have the game automatically generate Team Color and Capture Color tags for you based on those offsets!
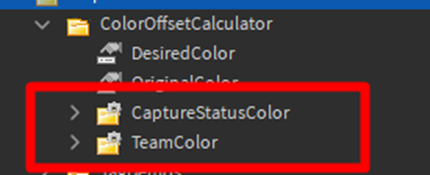
Once the tags are generated, copy whichever one you want, stop the game from running and paste it as you please.
Capture Color
This tag is like the team color tag, except it will color the instance Green when it is neutral (think of this like the base of the flagpole that shows green for its “ready to capture” state.)
Movement Tags
Movement tags allow for parts & models (with PrimaryParts defined) to cyclically move around in an animated fashion.
Move
Move tags allow for a part/model to move and rotate along a group of keyframes.
Keyframes are defined by individual parts; their rotation and position represent a point in the animation that will be animated to from the previous point.
The name of keyframe points represents the time in the loop that they keyframe is assigned to.
For example:
If there are points named “0”,”.5”,”1”; then the loop will take 1 whole second (the largest keyframe’s name) and will go from 0 –> (tween for .5 seconds) > .5 –> (tween for .5 seconds) > 1 [repeat].
Spin
Spin tags allow for a part/model to spin at a constant rate.
Simply define the velocity you wish for the part/model to spin at within the configuration.
Player Behavior Tags
Player Behavior Tags define instances that interact/react with players’ characters.
Conveyor
This tag turns the instance its under into a conveyor belt, where the speed/direction the player is “shot off” at is defined by the configuration.
Rotational Conveyor
Similarly to the Conveyor tag, the rotational conveyor will spin a player like a turntable when they stand on top of its instance.
Damage Player
This tag will damage the player when they touch its assigned instance, player health ranges from 0-100, so plan accordingly.
Disappear
This tag will allow the instance its assigned under to behave like a “disappearing platform” from obstacle course games where the instance will disappear temporarily once touched.
Sit
This tag will put the player into a seated state when touched, this is useful for creating slides where the player can freely fall down the slide after being seated.
Teleport
This tag will allow for a player to be teleported from one part to another, toggling on the two-way option will allow for players to also travel back from the destination part.
NOTE: In testing, I’ve noticed that two-way can cause rapid back-forth teleporting. Rather than using two-way, consider using two separate teleport tags to ensure the destination part and the return part aren’t in the exact same location.
Map Markers
The Map Markers (located under workspace – > Terrain – > Markers) serve as a representation of the different points on the map.
DO NOT move any of these markers as they are static in game and your map may be misaligned as a result.
Kill Zone
The kill zone is the zone that will kill the player when their head touches it (their body can still go through it, it’s strictly the head that triggers the kill).
Sand
The sand zone is the absolute bottom of the map ocean and serves as where you should scale the bottom of your islands and harbors down to (to ensure no floating islands/harbors).
Water
The water serves as a guide for creating docks and submerging different parts of islands/harbors, it also serves as the point that boats will float on top of.