
Collision Meshes
The 3 Primary Purposes Of Collision Meshes
Reduction Of Collision Data
Definition
Collision meshes drastically simplify the amount of faces Roblox uses in computing world collisions with the mesh.
Even the most minute reductions in this area can lead to exponentially higher performance boosts.
Example
Let’s take for example, the Basic Gunner:
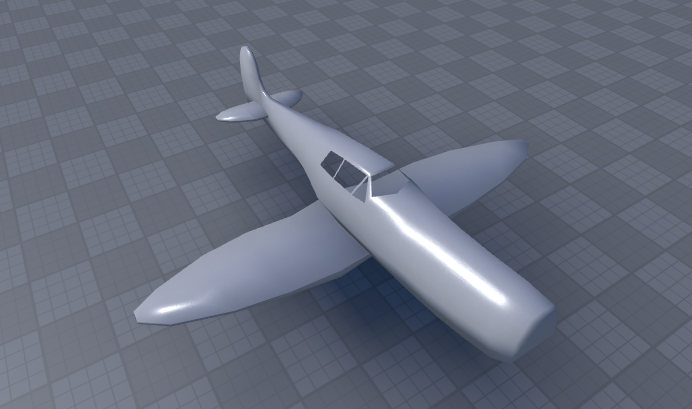
By default the Basic Gunner’s collision data looks like this:

(As you can see, this is sort-of optimized; but it could be a lot simpler.)
So now let’s build a collision mesh for the plane:

(Now we have a super simple mesh in the plane model that will be hidden when the game starts and serve as it’s collision data for Roblox.)
The new collision data now looks like this:

(This is magnitudes more optimized than the original and will serve to greatly improve performance while being nearly unnoticeable to the pilot of the plane.)
Use-Cases
This sort of optimization is currently used within all vehicle models to optimize their interactions with each other, players and buildings.
Bullet “Hit Zone” Definition
Definition
In vehicles, collision meshes can be separated into different parts that each represent a different “hit zone” of a structure.
These hit zones could then be used by the game to determine where on a vehicle a bullet has hit and to distribute damage accordingly. (e.g. 1 damage on a wing hit, 5 damage on body hit)
Example
Let’s once again take the Basic Gunner for example:

In the basic gunner, the plane’s body is 1 single mesh.
This is ideal visually as everything is continuous and this allows for texturing of the entire plane at once.
However, when registering bullet hits across several different plane types; this quickly becomes an issue.
Say we land 2 gun shots on the Basic Gunner:

How do we determine how much damage to deliver to the plane for each shot?
Logically we’d say “Well the wing doesn’t contain an engine, so less for the wing and more for the body”.
But since the plane is 1 part, there’s no consistent way to figure out which location the bullet landed on.
This is where Collision Meshes can serve a dual purpose when divided properly:


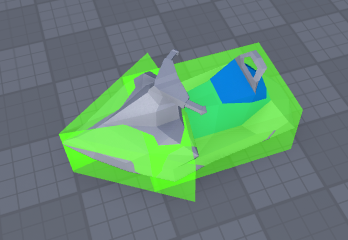
For the Basic Gunner’s collision mesh, we have it divided up into 2 parts:
- A Wing Part
- A Body Part
Now we can easily tell where a bullet has landed by detecting which part it hit:

Use-Cases
This sort of division is currently only utilized within plane models to discern between the following:
- “wing” (name part wing to be detected as a plane wing)
- “body” (name part body to be detected as a plane body)
Custom Collision Behavior
Definition
Sometimes it’s desired to get custom behavior from a model that may not come default with roblox’s generated collision data.
Example
Let’s once again take the Basic Gunner for example (though this feature exists for all plane’s landing gear to ensure consistency).
So the Basic Gunner has 3 wheels:

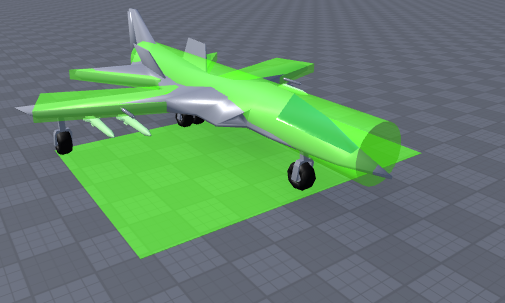
Say I want to ensure all 3 wheels lay down flat at the same level consistently and optimally.
What I can do is create a separate collision mesh for the landing gear:

Now I can rest assured that the wheels will lay evenly at the level of that part, not cause random tilt and not get stuck in the ground.
Use-Cases
This sort of behavior is currently only used to create a block around the plane’s landing gear but can be used in any situation where you see the need for custom collision behavior.
Designing Collision Meshes
Ignorable Features
These ignorable features don’t require any consideration when making the collision mesh and can be made to be walked through or over-covered if needed.
These ignorable parts generally come in 2 variants:
Decorative Parts
Decorative parts are parts that only serve to add to the aesthetic of a group and aren’t essential to its collision behavior.
Out Of Reach Parts
Out of reach parts are parts that the player cannot reasonably access to collide with.

Design Goal
The primary design goal of collision meshes is to reduce the number of faces the player collides with when touching the mesh to as little as possible.
Some examples:
(Please Note: these were made in Roblox Studio, so many parts are annoyingly hanging out, however externally modeled ones should fit much more closely)
Design Application
Collision meshes only need to be applied to the following vehicle types:
- Planes
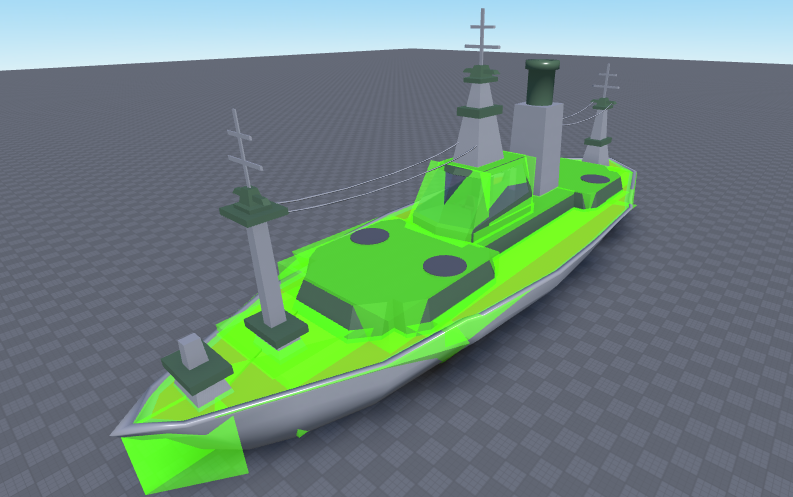
- Boats
Collision meshes DO NOT need to be applied to turrets (regardless of whether they’re on a boat or not, please exclude boat turrets from collision mesh design).
Design Notes
Collision mesh part “Hit-Zone” names should by divided into 3 types:
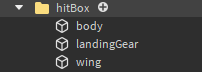
- “body” (body collider for plane bodies and all boat parts)
- “wing” (wing collider for plane wings only)
- “landingGear” (landing gear collider for planes only)